
How do you publish a video tutorial on YouTube and give it its best possible shot at showing up in search?
It's a question every YouTube content creator has to contend with.
Publishing videos is a pretty intense process and as you take your video from concept to publication, you want to set it up for success. That's why today we are going to take a close look at the YouTube publication process.
This post is the final part of a 3-part series on making video tutorials for YouTube. We looked at the hardware you need to make a memorable video in part one. In part two, we talked software.
And today, I'm going to walk you through the exact steps we take every time we publish a new video to the DottoTech YouTube channel.
Inside the DottoTech publishing process
Ready to dive in and talk YouTube publication process? It all starts with uploading your video.
Uploading your video to YouTube
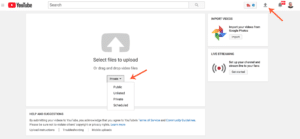
To upload a video to your YouTube channel, head over to your Creator studio. From there, hit the upload icon in the top right-hand corner. Next, select the file you'd like to upload or use the drag and drop feature.
You can list your video as public, private, unlisted, or scheduled. What do these options mean?
- Public: Anyone can see your video. It's listed on YouTube and can be found through search
- Private: Only you, or someone with special permission from you, can see your video
- Unlisted: Anyone with the video URL can watch the video but the video itself isn't listed in search
- Scheduled: The video is set to publish at a specific time
When you upload your video, make sure it's set to private because the first 24 hours after publication affect your video's ranking. That's why if you want to rank well in search, you need to do a bit of work first.
Preparing your video for publication
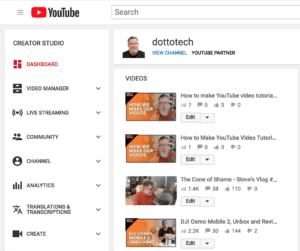
Once you've uploaded your video to YouTube, you'll see it in the video section in your Creator Studio.*
When you open your video, it will look a little something like this. The upload title will sit in the title space and you'll see some thumbnails on the right-hand side.
Time to do a bit of prep.
1. Create a custom thumbnail
The thumbnail is the first part of the video people see before they click through. Creating a custom, on-brand thumbnail will help you stand out.
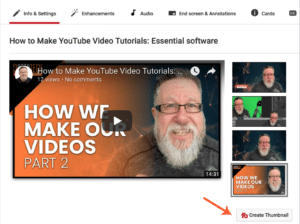
You can use your image creation tool of choice or try a free tool like AdobeSpark or Canva. We use TubeBuddy to help with the process.
TubeBuddy is an all-in-one YouTube channel management browser extension that makes publication tasks like thumbnail creation much easier to manage.
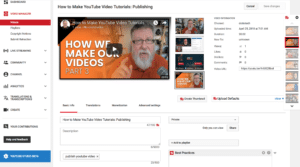
2. Optimize the title
Your video title is extremely important. It tells YouTube and potential viewers what your video is all about. Avoid being too clever– the best titles for YouTube video tutorials are clear but enticing. Set the scene and tell the viewer what they can expect.
Whatever you do, don't change the title after publication. If you do, YouTube will re-index your video based on the new title and it will affect your search ranking.
3. Add a video description
Tell YouTube and your viewers what the video is about. Your description is the perfect place to add any resources and links you mentioned in the video as well as more info about yourself, and your channel.
4. Add tags
Tags give the YouTube algorithm context– they basically help it understand what your video is about so that it can show it in the relevant search results.
We use two tools to help with the tags– VidIQ and TubeBuddy. Unlike the title, you can change the tags after you publish your video to help it rank better.
In-video Assets
Once you've optimized your video for search, it's time to add a few final touches to the video itself.
YouTube Cards
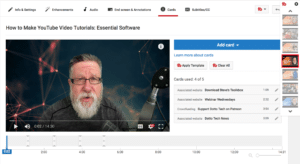
YouTube cards let you add extra info to your video by adding clickable cards. To add a card, simply click on “Cards” and then select “Add card.”
We've got four different types of cards to choose from.
- Video or playlist: Direct viewers to a related video or playlist you've put together
- Channel: Send viewers to a different channel
- Poll: Create a poll
- Link: Send viewers to an approved, relevant off-site location
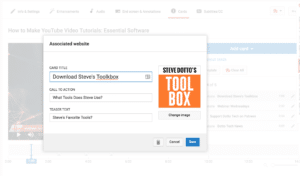
This is what a YouTube card looks like at the back end. All you need to do is give it a name, select exactly when it appears, and include a call to action.
You can add up to five cards per video– we usually use a set of four pre-made cards.
Using an end screen
The end screen shows up in the last few seconds of a video.
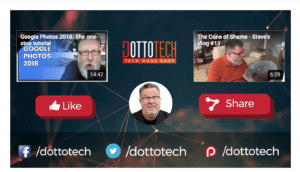
End screens are a way to keep a viewer on your channel by showing them other videos they can watch or things they can do.
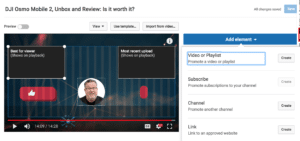
Like with YouTube cards, you can choose what kind of elements get shown in the end screens. Pick from:
- Video or playlist: Direct the viewer to another video or playlist on your channel
- Subscribe: Ask the user to subscribe to your channel
- Channel: Promote another channel
- Link: Send the user to an approved website
Within all those categories, you've got options you can choose from.
Monetizing your video
If you meet YouTube's criteria, you can monetize certain videos on your channel.
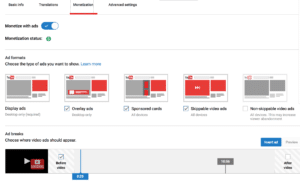
To do so, click on “Monetization” and then select what type of ads you'd like to display and where they'll be displayed. Depending on the length of your video, you can also include instream ads.
Publish and promote your video
We are almost there. The last step in the publication process is to move your video from private to public.
Your video is now out there. Cross promote it on other channels, add it to a YouTube playlist, and tell your followers about it!
I hope you enjoyed this three part series.
Until next time,
Have fun storming the castle!
What are you doing this Wednesday? Join us for our Wednesday webinar!
Every week we break big, complex processes like building your email list and growing a successful YouTube channel into small, actionable steps you can put into practice straight away.
Webinars not your thing? Head over to our YouTube channel and watch the latest videos.
*YouTube is currently beta testing a new version so if your version looks different than ours, it's because it's been updated.
How we Create our Videos is a 3 Part Series


